Vintage Crystal Cuff How to Instructions
Welcome! I am so excited to share this months Dollar Bead Box collection with you! My dear friends who own and operate the Dollar Bead Box are offering the first 20 people who sign up for a NEW subscription a FREE BABY JEWEL LOOM! Just use the Coupon Code LOOM when checking out.

It is easy to create warps and bead on the NEW Baby Jewel Loom. I have made many different projects using it including bracelets for wrists that measure 6 inches long.

There are a few different memberships including the Bead Box that you see above along with a separate membership for a Bead Bag. You can commit to one month or one year and the products vary from month to month but the quality and value are always consistent. Each month, your Dollar Bead Box will contain 12 to 15 carefully selected items with a guaranteed total minimum value of $60. This box is super valued packed as you can see!

I was inspired immediately after opening up my box. I couldn't stop making stuff! In fact I had to request more beads so I could keep creating all of the juicy ideas that were coming into my head. Aside from making pieces on the Baby Jewel Loom you can create some gorgeous stretchy bracelets with this variety of beads. Wink Wink, did you catch the part where you can order more beads? Well you can, with a paid membership you can reorder bead strands for $1.00 each.

Here are the materials I used in creating the Vintage Crystal Cuff
Dollar Bead Box beads, Baby Jewel Loom, Jewel Loom Needle, Leather Cording or Hemp Cording, Artistic Wire 24g Non tarnish Silver Wire, Beadalon Wild Fire White, Wire Cutters, Flat Nose Pliers, Bent Nose Pliers and Thread Cutters. The Aleene's Tacky Glue was used when I made the Earrings. Those instructions can be found in my book Jewel Loom Inspirations by Julianna C Avelar.

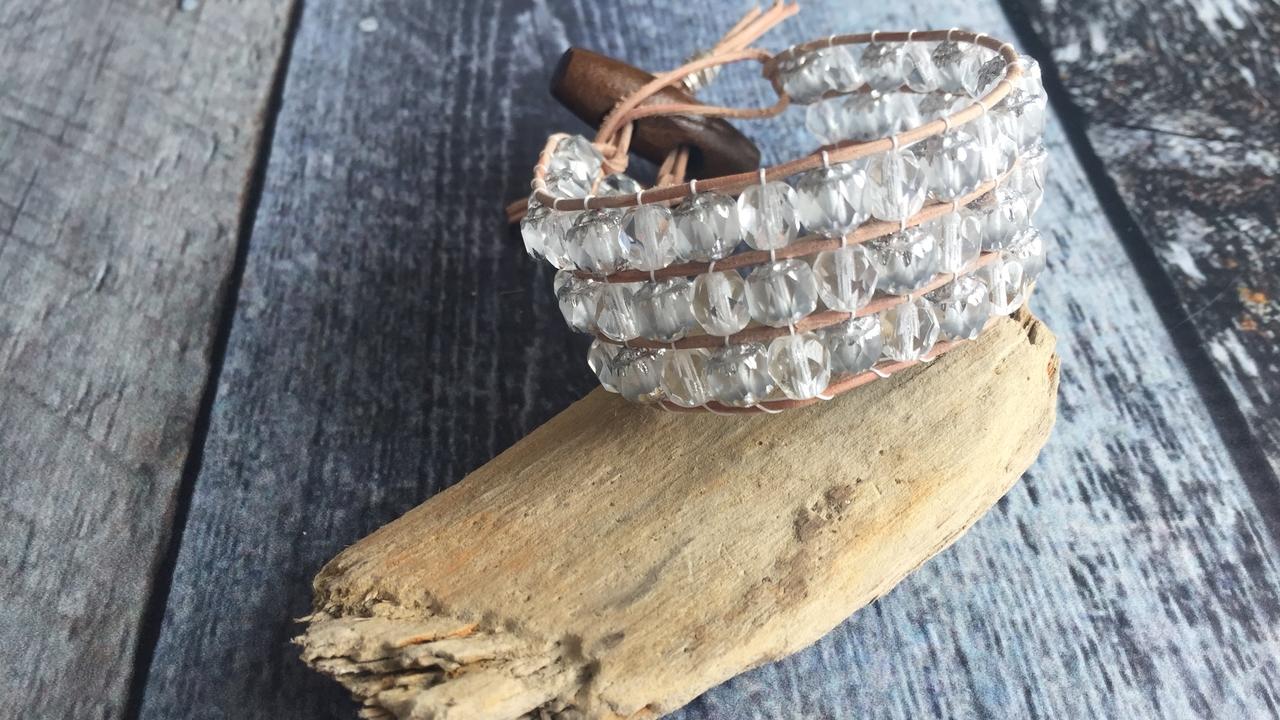
Dollar Bead Box Vintage Crystal Cuff by Julianna
Please note that the Baby Jewel Loom will only make a bracelet for a 6 inch long wrist. It is great for smaller projects such as pendants, rings, hair clips, brooches etc.
It will be helpful if you read the instructions that come with the Baby Jewel Loom on how to set up your loom. You can also watch my how to video featuring the original Jewel Loom here on my site by clicking on the Jewel Loom tab. Set Up for the Jewel Loom and Baby Jewel Loom are very similar. Only difference is that the Baby Jewel Loom does not have a rod that needs to be inserted.

Cut a piece of leather cord or hemp 54 inches long and secure to back button on Jewel Loom.

Secure two knots being very careful NOT to break your leather cording. Leather cording is very delicate so do not pull too hard on it or it will snap.

Turn your Baby Jewel Loom over and begin to create your warps.

This project calls for 4 warp threads as seen above.

This is what the back of your loom should look like

Working on a bead mat begin to weave your beads into the warps. I used both the 6mm Czech Fire Polish in Crystal and the 6mm Czech Class Cathedral Cut in Matte Crystal. Both are in this months box and extra strands can be purchased for a $1.00 each.

Always make sure that you go under all of the warps then on top of the warps as seen in my how to video.

Continue to alternate beads row by row making sure that you are all the way up to the top of the grooves and all the way down.

Flip loom over and cut cording closest to each button. THIS IS VERY IMPORTANT STEP AS YOU NEED ALL OF THE EXCESS WARP LENGTH. Make sure your cutters are positioned close to the button when you cut.

Lay piece flat on mat.

Cut warps that have looped ends in half as seen above. Then tie two warp threads together on each end see below.

Now, here is a great example of pulling too tight on the leather. I could have just faked this but I thought it would be a great way to show you how to save your project incase your leather snaps. Take the short piece of leather cord and the other warp thread and wrap 24g wire around both pieces. Now it just looks like a super cool element and no one will know any different!

Take note of the knots closest to the beads and how I tied them. Bring all pieces of cord together, almost all the way to the top and wrap cords together with 24g wire.

Tie the same knots on the opposite end and slide cording through button holes.

Wrap all 4 warp threads together with 24g wire.

Your piece is complete!!!!